
sections

intro
This is a guide on turning something from your laptop into something people see in the real world. We’re talking informal physical media— zines, pamphlets, posters. I’ve never made money off my work so this sadly has no insights on that.
I borrow from How to make a zine and Zinebook while providing more concrete steps and the tools I use. Every resource is listed immediately below for quick reference1. This guide will keep growing, so I’ll put changes in footnotes.
Let’s make something!
INGREDIENTS
. work of text or illustration
. the audacity

EQUIPMENT
. printer
. scissors
. internet connection
. thumbtacks or tape
. book or folder
ZINE RESOURCES
. How to make a zine
. WikiBooks Layouts
. Zinebook Tips
. Common Trigger Warnings
VISUAL TOOLS
. Colorhunt
. Smithsonian Images
. QR Code Tiger
LAYOUT TOOLS
. DaFont, Canva
. Google Docs, LibreWriter
PUBLISHING TOOLS
. Creative Commons License
. gdoc.pub, itch.io
. Tumblr, A03adapting media
To me, publishing means adapting work so new audiences can see it. Taking things out of our workshops and into the world. Are you cropping photos of your sketches for Facebook? Are you copying parts of a poem into a DM? That’s publishing!
But it raises questions that don’t always occur while making stuff:
Who’s going to see this?
How do we want them to experience this?
How might their experience limit or expand what we can put in the art?
Sketches look different in-person and online. One audience might have small screens, another might pass your work in the street. Essay pacing changes between thinner mobile screens and wide printed pages. So publishing means managing those changes.
I make text. Essays, poems, stories. So my publishing requires fitting text into a readable format. I prefer formats that are:
Easy to adapt work into
Easy to produce
Easy to share
Likely to be seen
formats
posters
ADAPT: Must fill 1 or 2 pages.
PRODUCE: Easy to print. No special layout.
SHARE: Flimsy. Must hand out or tape up somewhere.
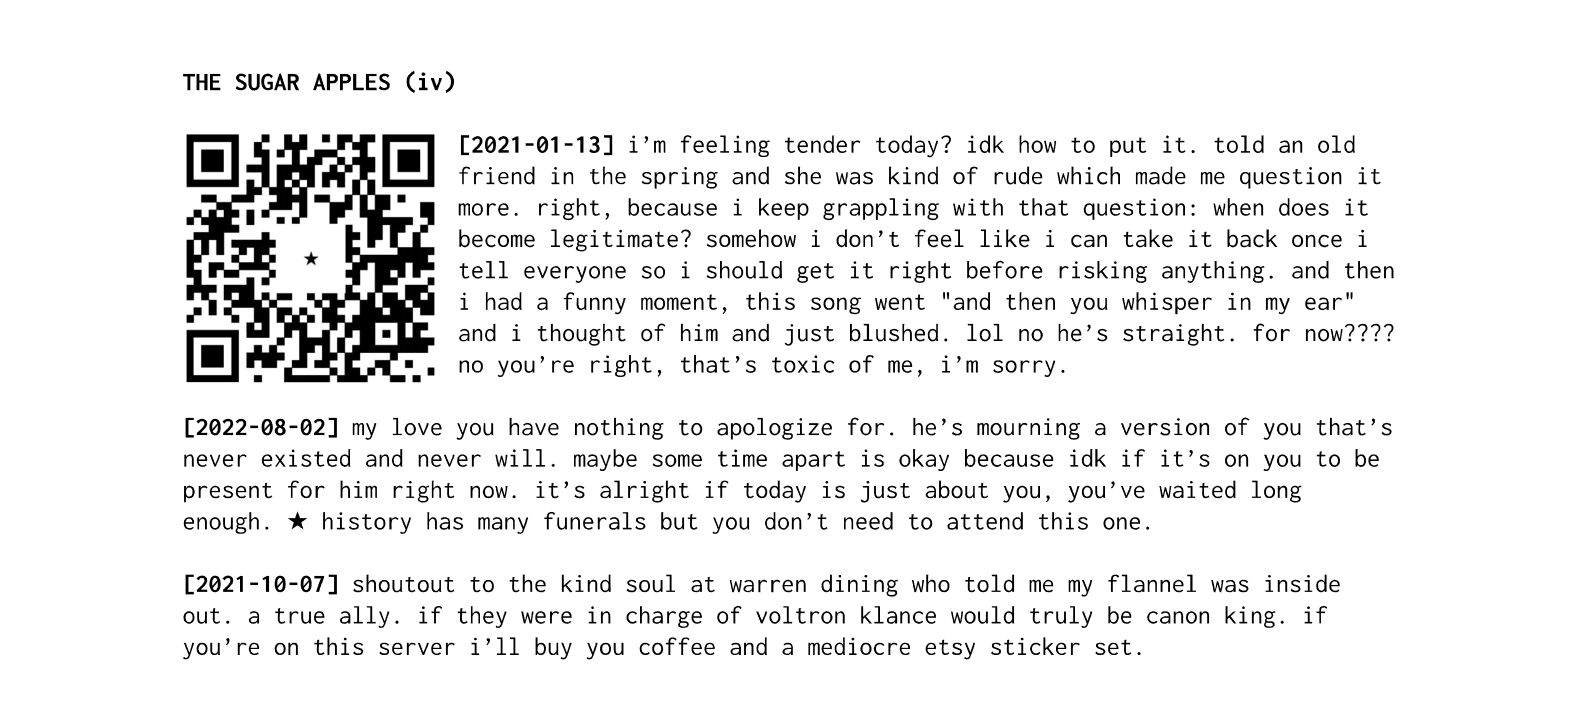
VISIBLE: Very visible! May compete for space.Take a sheet of paper and print on it.
These are the easiest to make! I’ve used them for open letters and THE SUGAR APPLES (iv). Remember to be mindful of other peoples’ posters, especially on walls and lampposts. There’s room for a QR code, links, or your social media handles.
zines
ADAPT: Harder to fit into smaller pages.
PRODUCE: Needs special layout program. Takes time to cut, fold, staple.
SHARE: Can hand out or leave in public spaces.
VISIBLE: Depends on the location! Small fonts less accessible.
Fold a sheet of paper and maybe staple it to other sheets.
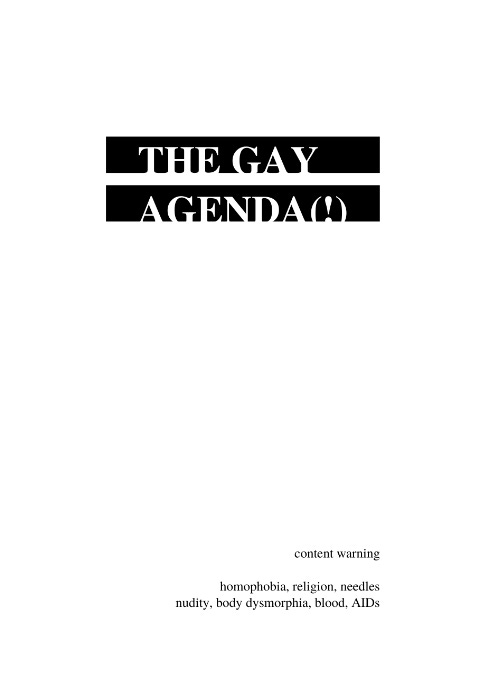
These take more time but I find them rewarding! I’ve used these for THE GAY AGENDA and BALLAD OF URBURBIA, and love how intimate they feel.
With a 8.5x11 sheet of paper, you can make...
a 4-page zine (fold in half twice)
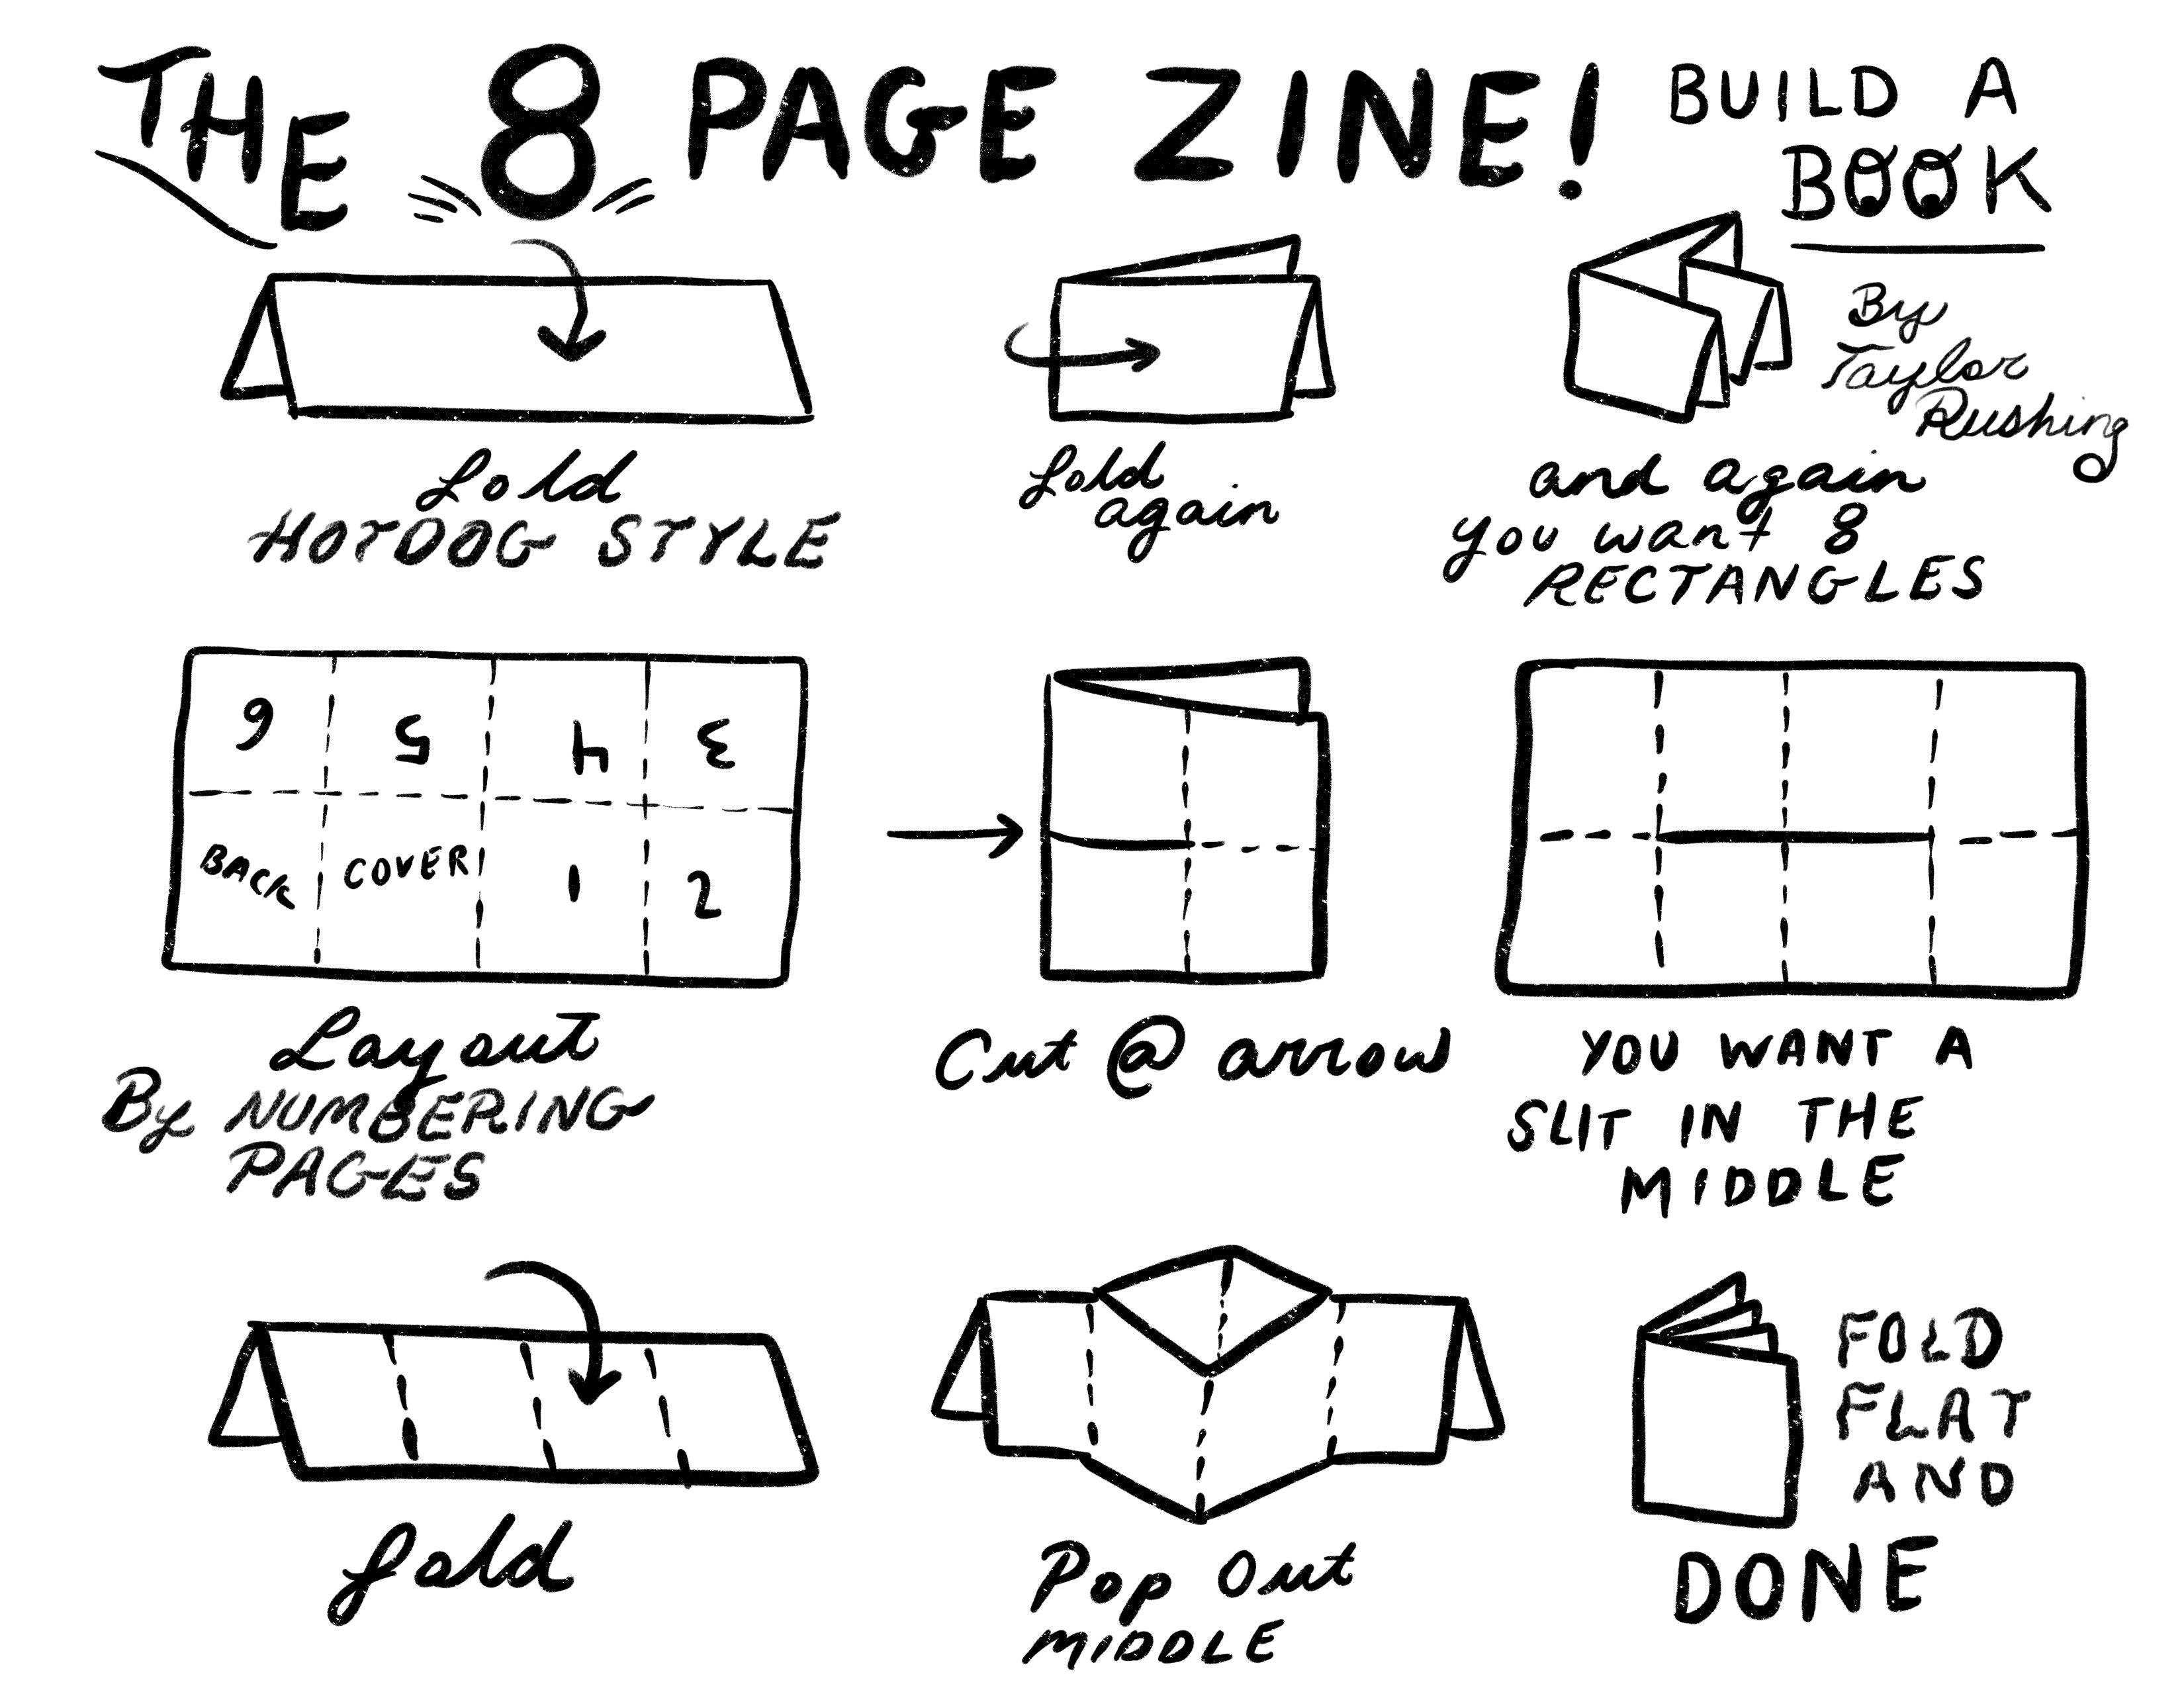
an 8-page zine
more complex formats
I recommend WikiBooks’ Zine Making for more detailed ways to fold, cut, and staple. Run a ruler or credit card over the folds to tighten.


layout and visuals
Pretty visuals give strangers a reason to read your work.
I use Google Docs and LibreWriter for simple text-heavy layouts. I prefer Canva for zines and basic image-editing. Google Docs has the advantage of familiarity, letting friends edit/revise, and publishing through gdoc.pub. More on that later. Just take caution with your privacy on any convenient web-based tools! Consider a free VPN and encrypted messaging while making, researching, and distributing art.
Add trigger warnings as early as possible. Sensitive, powerful art is valuable— but give strangers the chance to consent or opt-out. This is a good starting list! For essays, I’ll usually put a content warning header, then a bold title, then a large image, then the main text. For zines, the 1st/2nd page is ideal.
Play with bolding, CAPITALIZATION, strikeouts and highl★ghts. Check out the glitch it yourself zine for great ideas on warping and reusing images!
You can find fonts on DaFont, colors on ColorHunt, and free images on Smithsonian. I prefer monospace fonts, Arial, and Times New Roman (it’s easier to deliver new messages with familiar faces). Try converting images to black and white (turning saturation to 0) and increasing contrast so they look sharp on white paper. Always check if your images look good when printed.
distribution
printing copies
DIY: Takes long. Cheapest.
LIBRARY: DIY if you don't have a printer.
PRINT SHOP: Bulk. Expensive. Offers binding.
I mostly use campus library printers. They’re close to my drop-offs, study halls to cut/fold copies, and affordable. WikiBooks’ notes on printing and print shops are great. Test one copy first before printing the rest.
physical
CORNERS: Tucked away for someone to find.
WALLS AND LAMPPOSTS: Taped or stapled up.
Bring a backpack for your supplies, a book/folder so the paper doesn’t crumple, and water. Triple-check your vandalism laws and campus conduct codes, and make use of designated public spaces or “free speech boards”.
Go for a walk and see where posters are most visible.
Keep supplies in your pockets for quick access.
Use staples and thumbtacks for porous surfaces.
Thumbtacks can be removed easily and let people take your art home.
Consider elevators, bathrooms, stairwells— busy places that staff don’t clean during the day.
When taping:
Use scotch and masking tape indoors, packing tape outdoors.
Lay poster flat on surface and hold with one arm.
Tape top edge with the other.
With both hands free, tape the other edges.
If it’s a lamppost you can go all the way around with clear tape.
Remember that gravity and weather affect tape too!
establishments
LIBRARIES: Might have a local arts display.
COMMUNITY SPACES: Find communities related to your work!
BOOKSTORES, CAFÉS: Culture likely to accept zines.
Many places are happy to take local work! I like asking staff who to email for screening/approval, then sending a version of the layout that’s easy to read without rotating the page and proposing a drop-off time. For example, I use the queer student center on campus and my local café. Minimize the work they do and they’ll almost always say yes.
Hi, I hope this finds you well!
I'm a █████ poet from ████████ and was wondering if I could leave copies of a zine in ██████. The zine (attached below) is about ████████.
There are content warnings on the first page and the material does get serious. As much as I'm excited to add to the ██████ space, I also want to respect it and trust your call on whether this is a good fit.
The version I'm printing only differs in layout, so it can be folded -- this one re-arranges the panels from left to right, top down to reflect reading order.
Thank you for your consideration, and your upkeep of a fantastic corner of ████████!
digital
ITCH.IO: Big community. Multimedia. Projects under a profile.
TUMBLR, AO3: Big community. More limited formats.
GDOC.PUB: Needs to be in Google Docs.
Digital files are cheap to share. They’re also easier to steal and copy, so a Creative Commons License might fit your needs. You’ll find passionate indie art communities on itch.io, Tumblr, and Archive of Our Own. You can upload multiple files/versions to a single itch.io project, and keep all those projects under an artist profile.
And that’s it.
These aren’t rules, but things that started working as I kept printing words and taping them up. You'll figure out more from your first outing than a dozen of these guides could ever impart. I’ll put some zines I like2 in the footnotes— so let me know if you make any and I’ll link those too.
Make art, make love. Have fun!

Heavily inspired by the TTRPG Safety Toolkit.
Some zines I like (a growing list):
i will not delete my games, sweetfish.
how to manage the heat, sweetfish.
How To Be A Trans Scientist, Aster Olsen. (TW: transphobia, transphobia in academia, outdated terminology)